Introduction
My name is Rich Katz, I’ve been in the game industry for over 28 years, first as an artist, then as a Technical Artist specializing in rigging, animation, tools, and pipelines for the past 20 years. I’ve built rigging systems and animation tools for several studios including at Zenimax Online for the Elder Scrolls Online, and at Blizzard for World of Warcraft.
Whenever I look back at past projects, especially those I built many years ago, I think “I can create something much better now”. It’s not just about creating a better rigging system, but one that’s “clean” and structured in a way that allows for much better subsequent modification and addition. Code at game studios often goes through several projects and many authors across many years, and eventually becomes very difficult to maintain or add features due to accumulated technical debt. I want to practice creating clean, understandable code, so that what I create can be easily understood by future me or other future developers.
After getting laid off last year, I decided to start working on my own rigging system at home. I wanted to do something constructive while looking for new employment, and potentially use it as a framework for potential contract rigging work.
Why not just build a rig using the tools integrated in Maya?
Surely that must be faster and easier than building a whole pipeline.
- Studios require a level of consistency between rigs. Animators should be able to move from rig to rig and know what features the rig contains and how to interact with it without re-learning everything. A system like this helps define a shared structure and naming conventions by default.
- Characters and creatures are often updated by the modeling team for various reasons. Sometimes things come up that aren’t that obvious until the Animators start to create poses and animations on the final model. Moving joint locations or adjusting character proportions becomes a minor issue rather than requiring a full reconstruction of the rig.
- The rig’s details are saved as data, and that data is portable. You can build rigs of different sizes and proportions by duplicating existing data as a starting point and making only the changes you need to, which accelerates building subsequent rigs within the same framework.
Who is this intended for?
- The first part of this tutorial series revolves around Python project structure and using that to guide the development of general Maya scripting libraries.
- The middle section of the series focuses on building a modular animation rigging system and writing Python code to standardize those modules. This includes a good deal of 3D matrix math and Maya node operations.
- The last portion of the tutorial dives into building a full user interface in PySide (Qt) version 6 using the Model/View framework and using delegates to customize the look of the UI elements.
I think anyone from novice to expert is likely to be able to find interesting new information throughout this tutorial series, especially if they have built or worked with similar systems in the past (or aspire to). Even technical artists that don’t necessarily work on the rigging side of things could find the UI section engaging.
Goals
I had several high-level goals in mind from the start.
Make extensive use of Maya matrix nodes and offsetParentMatrix
Game studios are often locked to older versions of Maya. Updating a whole team to a new version of Maya is a large undertaking, especially for a live-service game that requires minimal interruption to the art team. The tech art team needs to thoroughly test all of the existing tools, and for a large project that has a lot of legacy scripts, that’s a huge undertaking. Teams usually won’t adopt the absolute latest version anyway, just to make sure there aren’t any major bugs in new releases that may rely on future patches to fix. When I left Blizzard at the end of 2021, we had recently updated to Maya 2018, and at Respawn we had just moved from Maya 2019 to Maya 2022 early in 2025.
Autodesk introduced a slew of new Matrix nodes and the “offsetParentMatrix” transform attribute in Maya 2020. I hadn’t gotten a chance to use it in any production tools at work yet. So this became one of the pillars of my rigging system, to get intimately familiar with the benefits and drawbacks to using these nodes in rigs, and to try to replace as many constraints as possible with networks of these matrix nodes.
Get more familiar with Python 3 – type hints, f-strings
As a result of being slow to adopt new versions of Maya, and trying to delay doing a pass of legacy tools to update existing Python 2.x scripts to work in Python 3, studios have put off moving to Python 3 for as long as possible. I had written some standalone (not for use within Maya) Python 3, and had just finished an audit of our team’s tools at Respawn to Python 3. Maya 2022 was the last version to support Python 2.7, and it also supported Python 3, but not at the same time. So we moved to Maya 2022 in “Python 2 mode”, I did the audit, then switched the pipeline to “Python 3 mode” within Maya 2022 and it went pretty well.
However, just making existing scripts work in Python 3 usually ignores many of the new features. I used f-strings in my standalone Python 3 scripts (and they’re pretty similar to Python’s str.format() string formatting, so it wasn’t a huge change for me). Moving from writing long docstrings with lists of arguments to trying to embed the argument type hints is a required skill I needed to practice.
Besides f-strings and typehints, I wanted to look for other opportunities to experiment with newer features of Python 3, including dataclasses, pattern matching, and even dictionaries that retain insertion order.
Use more OpenMaya API 2.0 and less maya.cmds
When I first started writing scripts within Maya, I used Maya’s Embedded Language (MEL). When I transitioned to Python, I used maya.cmds because it was familiar (it’s basically a ‘swig’ of MEL into Python – a direct port of the same commands). I’ve used the Python OpenMaya API over the years, but I wanted to lean on it even more for this project. There’s a lot of functionality buried in the API that maya.cmds doesn’t have, but there’s also a lot of things that maya.cmds does for you or hides complexity of the underlying API, so this was going to be an interesting process of seeing how much API I could use without driving myself crazy.
Structure
There’s no one right way to structure a project, but there are probably an infinite number of wrong ways.
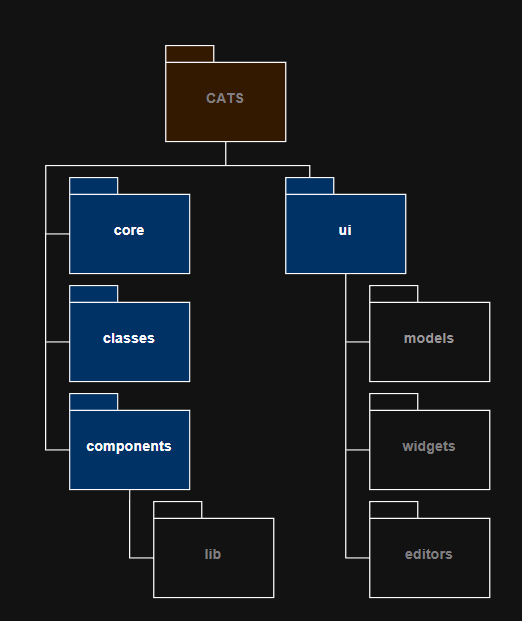
In the past, when building rigging systems, I often started in the “middle” and everything else evolved organically around it as needed. Sometimes I had to build around existing components I wanted to keep from a previous iteration. Since I was building this system from scratch, I wanted to start with a rough plan for where the various parts of the code would live.
Core – Base Utility Functionality
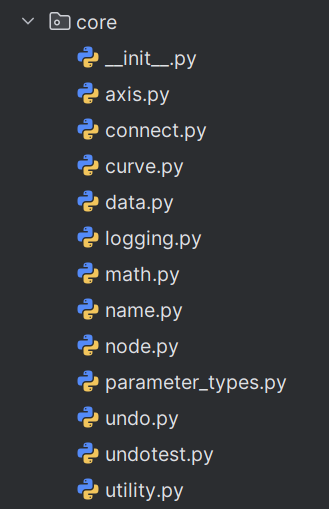
Having done this before, I knew there were going to be functions that I needed at the ground level and use those to build the rest of the system upon. I’m not sure if this is the best approach though, what if I build core functions that I never use? It definitely grew as I built out the higher-level systems, and I moved some functions from subsequent modules into the core so they could be shared more easily. I’ll list the core modules in a future chapter.
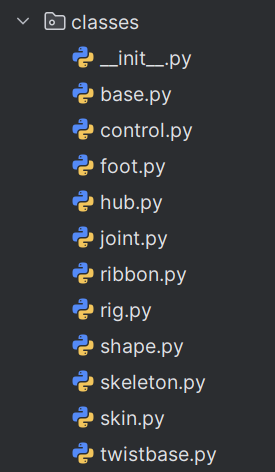
Classes – used for building and accessing nodes in the maya scene
I wanted to build the rigging system in such a way that I could later re-use some of the modules to build tools to interact with the rigs. Basic classes such as Joint or Control could wrap existing nodes in the scene of the appropriate type, or create them in the scene and return an instance of the class wrapping the new node.
I strayed a little from the pure intent of this group, though. I created some classes in this directory that were mostly just used for constructing a final rig component without cluttering the component class with too much creation code.
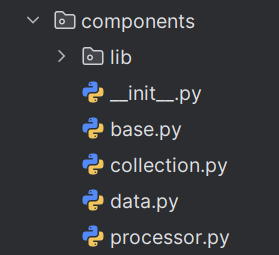
Components – ABC OOP classes for building entire rig components
The rigging components are the next level of the project structure, importing and using functions and classes from the Core and Classes modules. At the simplest level, these modules contain classes that have a .build() method that the rig builder will use to construct that rig component. I’m using Abstract Base Classes (ABC) in Python to create a base class with an abstract build() method and some shared functionality that the components will inherit from.
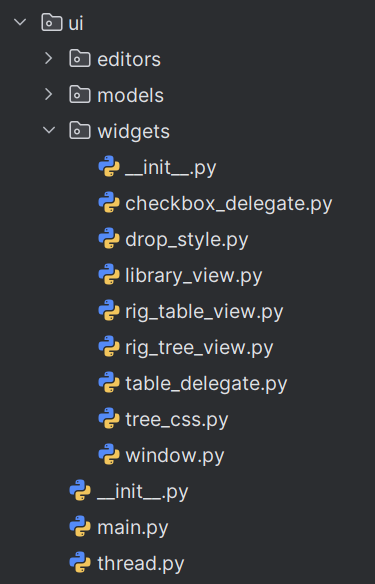
User Interface
Visually, the UI I envisioned was pretty similar to ones I have written or worked with in the past. However, some of the UI’s I had previously written used PySide’s “Widget” controls (QTreeWidget, QTableWidget) which hides some of the complexity of PySide/Qt from the author. I wanted to build this UI in the more native way within Qt and use the Model/View paradigm that is a little more complicated on the UI backend, but then again some of the management of the data under the hood would be taken care of by the models. The hard part would be trying to share a data model between a QTreeView (hierarchical list of rig components) and a QTableView (property editor for individual rig components).
Reloading modules during development within Maya
Importing and reloading modules changed a little between Python 2 and 3, but the challenge (as has been the case in Python 2) is fully reloading modules within Maya while iterating on code in an external IDE. Python holds a dictionary of imported modules in sys.modules, and also some names in globals(). Modules also hold onto previous versions of modules, so to make sure everything I’m running is the latest, I want to pop all of the modules in the rigging system out of the python sys.modules dictionary, delete the cached data, and then re-import everything. It took a while to get this working correctly, but the sacrifice I had to make was that it all needed to be run from the global level of the Python environment, instead of being able to build a “reload all” module and run it from a single command. I’d like to go back and re-investigate this later, but for now it works for solo development.

Questions
As I started development of the system, there were a few questions I had to answer as I worked through it.
- How strictly will I use matrix nodes over constraints?
- How much inheritance in class hierarchy?
- How strictly will I use maya API 2.0 vs. cmds?
- What kind of spine? Just FK, ik/fk, or a “hybrid” style?
- Should limbs have curve-based deformation by default?
- What other features should I implement in a first pass of each component?
The answers are “some” and “maybe”. I broke my own rules pretty early as I used maya.cmds to bypass some of the complexity of the API. I wasn’t working with anyone else who I could ask to do code reviews or sanity checks on the system. I wasn’t initially working with any animators to get usability feedback on the actual rig itself. This isn’t ideal, and I should have gotten more input in the directions I chose alone.
But the strength of a rigging framework like this is that if an animator really hates the spine I created as the default, I can always create a new spine component that satisfies different criteria, and add it to the component library for the framework. It’s a process of addition, as opposed to replacement.
Who does what?
On a development team, how would tasks be divided between individual contributors?
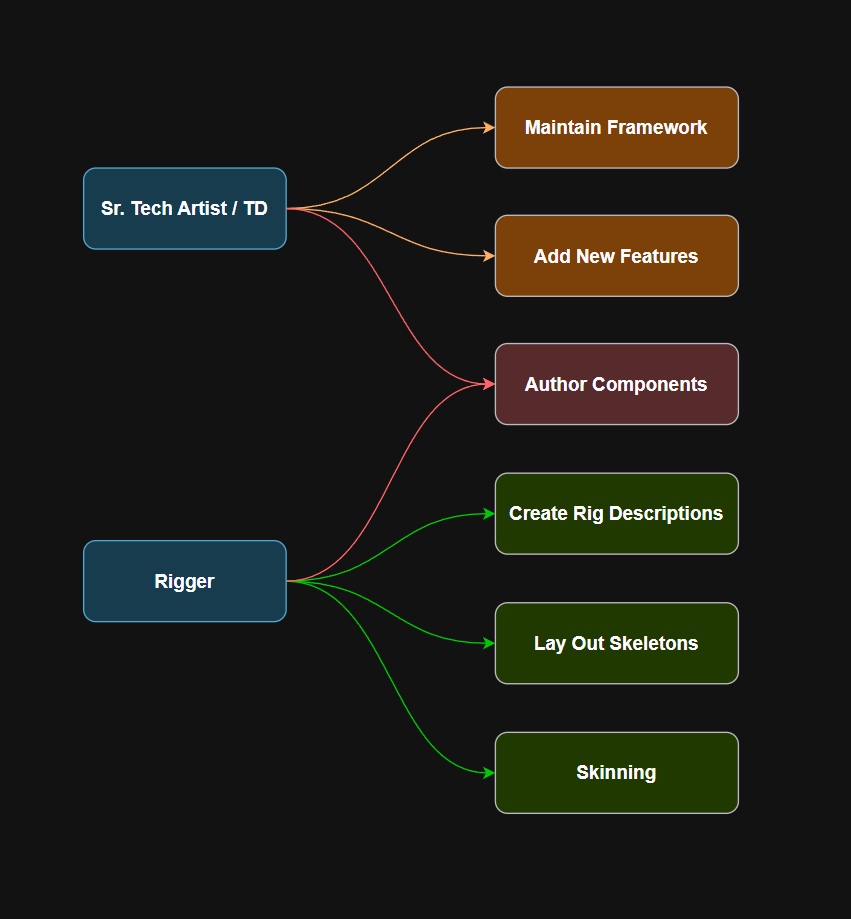
I envision it would be something like this, where a more engineering-focused Technical Artist primarily maintains the rig build framework and adds new features as needed. A Rigging Artist can dedicate their time to building and skinning the rigs. I imagine that for the vast majority of rigs, the rigs would be constructed using existing components, once a solid library is assembled.
Creating new components, when necessary, could be a shared responsibility between the TA and Rigger. A rigger with even minimal coding experience could easily create variations of existing components. More complicated components could be developed jointly, and this could provide an opportunity for a rigging artist who wants to grow their coding skills under the mentorship of a technical artist.
Why not a video series?
Maybe I’m old-fashioned, but I find reading a document like this is easier than trying to follow a YouTube video. I can go at my own pace, re-read sections easily, and search for specific terms I’m interested in without wading through minutes of unrelated information.
I hope others can read through these documents and have that same appreciation for the written word. Have fun!
What’s ahead?
I’ll be posting the retrospective in chapters over the next few months. Stay tuned!
If you find this retrospective informative, useful, enjoyable, or some other adjective, you can buy me a coffee here.